Search This Blog

Monday, 28 June 2010

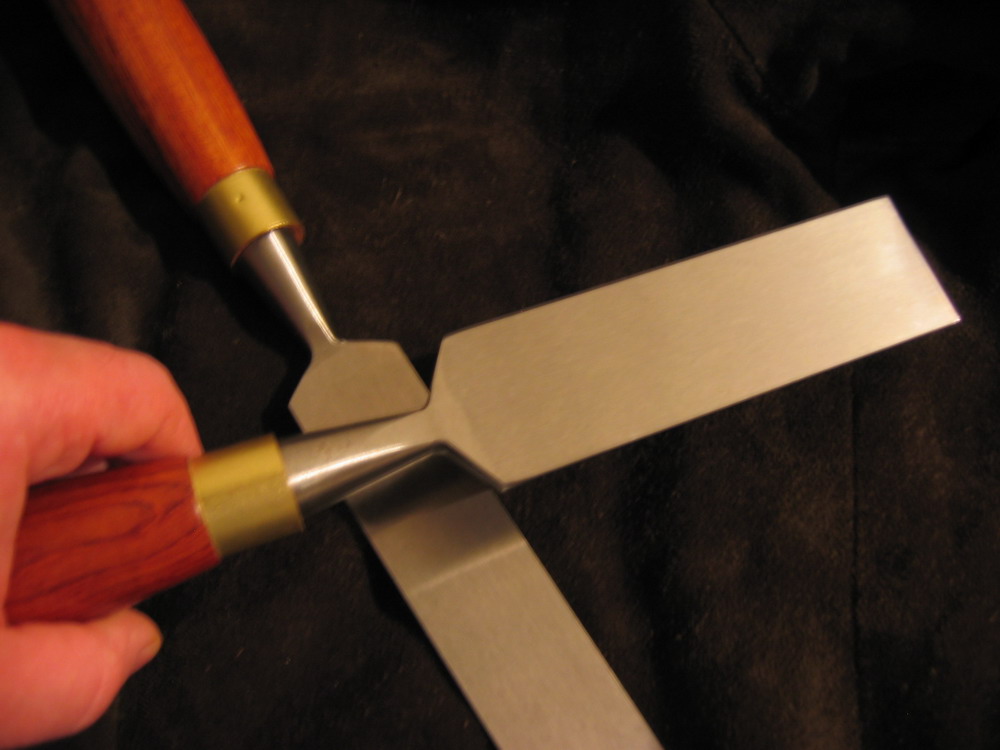
Clifton Anniversary planes update

Clifton Planes

News just in from Sheffield - The first of the Clifton Anniversary planes are nearing completion and will ship in the next couple of weeks.

The planes are having the final touches applied - etching the cutting irons with the number of the plane that they will be supplied with. Planes that have been pre-ordered already will be dispatched first, the remainder will follow a week or so later.

The factory have asked us to supply them with Shield Technology VanGuard Anti-Rust Coating to provide extra protection for these tools as some of them may be stored for a long period of time.

We were lucky enough to grab an additional allocation of planes, so we still have one or two of each size available.

Monday, 21 June 2010

Carpe Diem

Workshop Heaven Special Offers

Amid speculation as to whether the Chancellor of the Exchequer will raise VAT to 20% in tomorrow's budget (Tuesday 22nd of July), we have extended our Father's Day promotion on all British made products until after the announcement. It would be pointless for me to change all the prices and then have to change them again 24 hours later. So if you are thinking about a Clifton Plane, Atkinson Walker Sawblade or some Ashley Iles Chisels, sieze the day!

Thursday, 17 June 2010

FAMAG Quiz!

FAMAG drill bits

Welcome to the Workshop Heaven FAMAG Quiz. Answer the following ten questions to win a bottle of bubbly and a selection of FAMAG goodies! The marks are shown after each question. In the event of a tie, names will be drawn from a hat by our new Sales Manager, Chris, when the competition closes on the 30th of June. The winner will be reported here and informed by email.

Questions:

1) Who invented the Forstner Bit and when? (2 marks)

2) What are the smallest and largest diameters of bits in the 3500 series? (2 marks)

3) What do the letters F, A and M stand for in FAMAG? (3 marks)

4) Should a plug cutter ideally be used in the middle of a board or close to an edge? (1 mark)

5) I want to bore through timber, thin metal and brickwork in a single pass, which series of FAMAG bits should I use? (1 mark)

6) What range of bit sizes will a 2202.000 Vario countersink fit? (1 mark)

FAMAG drill bits

7) The photo above shows a set of hollow Bormax forstner bits that allow the centre pin to be replaced with a standard drill bit. In what situation would this be useful? (1 mark)

8) Bormax3 are the only carbide tipped forstners in the world that can be used safely in which type of drill? (1 mark)

9) I want to drill a hole in some Lignum Vitae, should I use CV or HSS-G bits? (1 mark)

10) In which German town have FAMAG been continuously producing drill tooling since 1865? (1 mark)

To submit your answers, please use the contact message form at Workshop Heaven.

Sunday, 6 June 2010

VanGuard

Corrosion Control

I recently heard about a guy who was having problems with tools going rusty. They were stored in his van overnight so condensation forms on them each morning and he lives on a small island so the water vapour in the air is salt laden, making it more effective as an electolyte - one of the conditions needed for corrosion to occur. I contacted Paul Prince at Shield Technology who suggested the 'belt, braces and jockstrap approach' was called for, i.e.. surface protection, contact corrosion inhibitors and VCI (airborne) protection - all in liberal measure.

I emailed Paul back suggesting that a huge ToolGuard VCI pot which would protect anything stored in a van would be a popular product - after all, how many tradesmen have vans? I lightheartedly suggested he could call it something like VanGuard. He said the concept wouldn't work as vans are too draughty and even if the pot were the size of a biscuit tin, a good stiff breeze would have all the corrosion inhibiting vapour drifting off down the street.

He did however come up with a new product which is the 'belt, braces and jockstrap approach' in a tin. It has a viscous high quality mineral oil base so it will provide barrier protection, plus it has both ferrous and yellow metal corrosion inhibitors and a VCI additive, so your treated tools act as VCI emitters themselves, if you miss a spot then the VCI chemical will condense on it and prevent the water vapour from acting. Wipe it on with a rag and store your tools in a sealed box so the VCI element can do it's thing.

To my great surprise he kept the name! Shield Technology VanGuard in 125ml and 250ml tins is now available on the website!

Wednesday, 2 June 2010

A Bit Different!

FAMAG drill bits

We have stocked FAMAG Bormax 3 carbide tipped Forstners for a while now, on the basis that no-one else was carrying them and they were just too good not to be available in the UK.

Recently I tried out one of their 1594 series HSS-G lip & spur bits and was quite astonished at how cleanly and quickly it cut. No picking out curls of compressed timber from the flutes here! In fact quite the opposite, a plume of chips erupt from the hole as you drill and the bit comes out as clean as a whistle - even in hard oily exotics.

The difference is that the flutes are not U-shaped as they would be normally, instead they are relieved behind the cutting edge - adding nearly 50% more space for the waste to clear, they are also very finely ground. Because the flutes are functioning correctly the chips clear properly and the bit stays cooler...which also helps with edge retention...which was already excellent because they are made from a material normally only used for metalworking bits. Percentage wise they are more expensive than most of the cheap imports on the market, but in real terms it's not a huge amount of money, the difference in performance however is phenomenal!

Anyhow, the net result was a little spending spree and the next thing I know we have the largest selection of FAMAG products in the UK. We have ended up re-organising the warehouse and installing new walling and shelving to fit everything in! Isn't it amazing how a little drill bit can change your life?

The impact on your life may not be quite as pronounced, but I hope you will give them a try. We have put several lines on special offer and are even offering some bits at below cost, because I believe there is no better advertisement for them than having one in your workshop and trying it for yourself.

Friday, 7 May 2010

Chisel Backs

Ashley Iles chisel back

We've had a couple of questions this week about preparing chisels, specifically the hollow ground Ashley Iles chisels, so I thought it might be worth covering it here. Lets start off with what we are aiming for on the back of the blade.

The backs of chisels used for paring need to be sufficiently flat that they can take a full length cut without diving into the wood or pulling up out of it by more than 1/10 of a mm over the length of the blade. The tolerance for chopping chisels is a little wider as there is a limit to how accurately they can be held at 90 degrees to the work.

When it comes to honing, a very slightly hollow ground back is preferable to a convex or perfectly flat one, the word ‘slightly’ is key here because it still needs to be flatter than a tenth of a mm in order to remain accurate. Dead flat itself is no good because you need to remove material over the entire back of the blade in order to polish the important bit that forms the underside of the edge. Also any imperfections in your technique will tend to cause bumps or drubbing of the corners, which are self perpetuating and eventually get worse if you are working on a sharpening medium that is larger than the tool.

Bumps in the back will register first against whatever material they come into contact with and then wobble around looking for another point of contact in order to become stable. A lot of people think that bumps are an insurmountable problem, they are not, they simply call for a different technique. Nonetheless, in an ideal world, somewhere between dead flat and one tenth of a mm hollow is where we want to be.

After a great deal of time and effort the team at Ashley Iles eventually managed to achieve a reliable 0.04mm (+/-0.02mm) hollow on their cabinetmakers chisels. Although still perfectly accurate from a woodworking perspective, they are just hollow enough that when you lay the back on a dead flat surface, they only make contact at two points.

To polish the edge, lay most of the length of the tool on the sharpening media and draw it off the edge, lift off, go back to the start position, and repeat. The underside of the cutting edge is in contact with the sharpening media for the full length of the stroke, so it gets polished within a few strokes. The edge of the sharpening media also makes contact with an area inside the hollow and wears away a little material there too, so over many years of sharpening, the back will gradually get closer and closer to dead flat but never quite get there - perfect!

So a dozen or so strokes on a fine waterstone to remove any grinding marks that extend through the cutting edge when you first get them, then a couple of strokes on a fine stone after each honing and that’s it.

Tuesday, 30 March 2010

More Haste – Less Speed

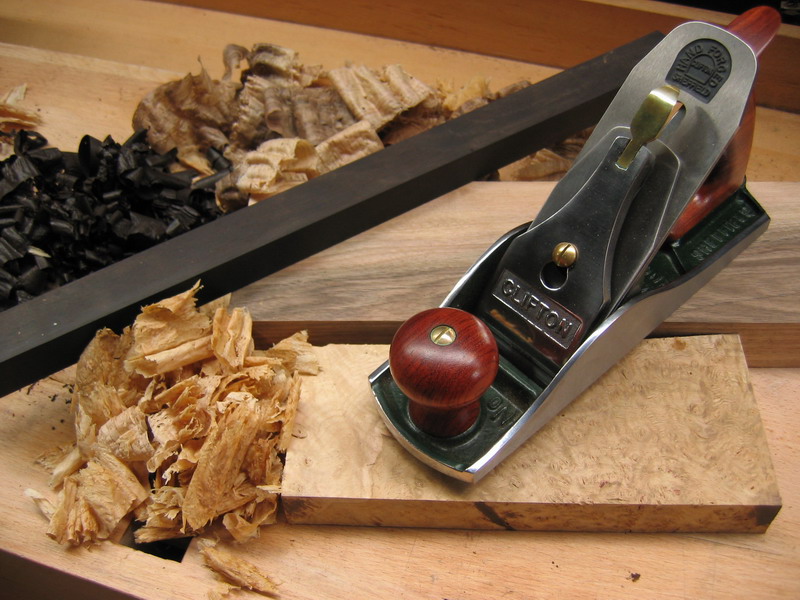
Clifton planing ebony walnut and oak

When you first start working with handplanes it is inevitable that sooner or later you will come across the problem of tearout. It is a common problem and every time you think you’ve cracked it another tricky piece of timber comes along that doesn’t want to play nicely. It usually happens because the grain of the timber is not all flowing in the same direction so the cutting edge of the plane iron is no longer cutting the fibres but instead is splitting them away from the surrounding material.

There are a broad range of weapons in the cabinetmakers arsenal to tackle this issue but it’s all too easy for experienced makers to omit the first and easiest way when they are advising others on how to tackle it, probably because they do it habitually and without thinking.

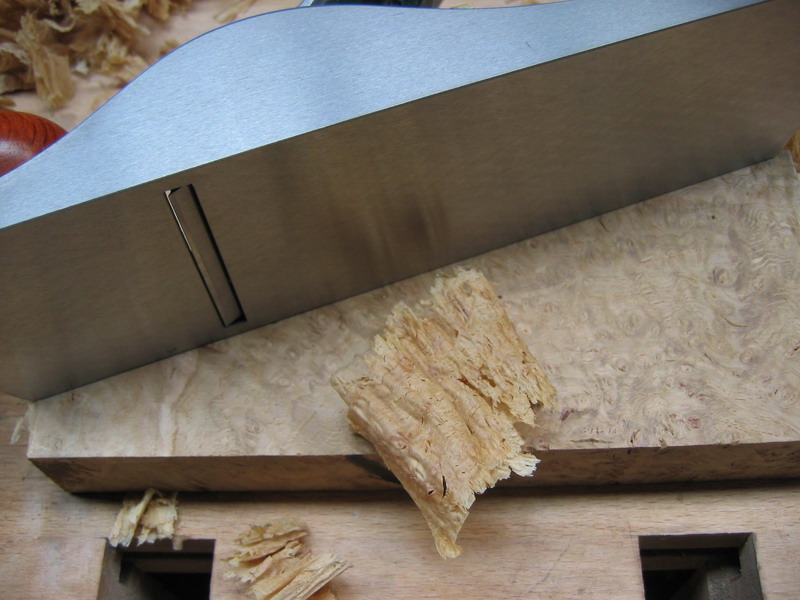
Clifton vs. Oak burr

Assuming your plane iron is sharp, the first port of call when you experience tearout is to slow down – right down. Nothing else changes, your stance, distribution of pressure on the plane, angle of the plane to the work, all remain exactly the same, you just take your good old time - perhaps ten seconds or so per foot of timber planed.

Observe the shaving as it emerges from the mouth, the shaving contains a wealth of information about what just happened at the cutting edge. Holes with flowing shapes and very thin frail edges indicate low spots, changes in the texture of the shaving indicate patches of reversing grain that the plane is coping with already and jagged holes with thick edges indicate areas that it is not coping with.

Quite often the simple act of slowing down is enough to either make the problem disappear completely or reduce it to a couple of thumbprint sized patches that can be cleaned up afterwards with a thin cabinet scraper.

The next simple step is closing up the mouth to a slit and backing off the depth of cut so that the plane is only just cutting, a really light wispy shaving invariably produces a finer surface finish than a thicker one.

Honing your cutting iron is the next step, as the first few passes with a freshly honed iron are much less prone to tearout. The final finishing passes on a piece of timber should always be taken with a freshly honed cutting iron, regardless of whether you only honed it five minutes ago or not.

Only when you have worked your way through the 'low hanging fruit' that requires no additional kit and the bare minimum of extra time should you start thinking about steeper pitches or scraping.

Thursday, 25 February 2010

Latest deliveries

Just a quick one to let you know that we recieved a delivery from Ashley Iles today. So if you have been hanging on for bevel edged chisels or a particular carving or turning tool, the chances are that we now have it in. Stock levels on the website will be updated within the next 24 hours.

The delivery also included the new Peter Benson 1/32" V-Tools, as advertised in this month's Woodcarving Magazine. As far as we know these are the smallest V-Tools ever made, perfect for details like the veining on feathers, fine hair and subtle foliage textures.

Also recently arrived are a small top up of Clifton no. 7s (already up) and a selection of lime carving blanks which will be photographed and listed over the next week or so. Our Clifton promotion finishes at the end of the month, so if you want to place an order for one at the sale price (regardless of whether it's in stock or not) please give us a ring and we can backorder it for you.

Monday, 15 February 2010

Micron Grit Conversion

Scary Sharpening Kit from Workshop Heaven

We have had a couple of questions recently regarding how the micron sizes used in our 3M lapping film equate to waterstone grits. Adrienne has done a little research and plotted the line of best fit between several sources (which were very close anyhow) and established the equation of the resulting line as 11139 times the micron size to the power of -0.9393!

I'm not sure if direct 'this = that' parallels are entirely appropriate in this case, my experience has been that lapping film produces a noticably finer surface finish than the equivalent waterstones. This may be a result of the particles all being extremely uniform in size, or the resin on the sheets being more durable than the clay of a waterstone.

Either way, here's the conversion table:

Micron to Grit conversion for scary sharpening

For abrasive film, an approximate comparison to European grits:

  • 5 micron is around P1200
  • 30 micron is between P400 and P500
  • 60 micron is around P240

If you are using the American grit system:

  • 5 micron is 1500
  • 30 micron is 360
  • 60 micron is between 220 and 240

Thursday, 10 December 2009

The Eagle Has Landed!

Finally! The first pallet of planes arrived today from Quangsheng and I have been busy unpacking and inspecting a sample of each type, taking photos, etc.

First impressions:

Better than expected - a lot better than expected; I was hoping for a budget alternative to the big three, a compromise that would suit folks with limited funds, something that would need less fettling than a vintage tool and might perhaps appeal to pro-cabinetmakers for rougher jobs like Jack planing.

What we have ended up with are a very serious range of tools indeed.

My concerns about the irons were completely unfounded, they are beautifully ground, rock hard and take that spine chillingly sharp edge that you only get with properly heat treated carbon steel.

Quangsheng plane

The machining on the bodies is excellent, I stripped a low angle rebating block plane this afternoon and put the sole up against a straight edge – a nice triangle of light between the mouth and the back indicating that the casting had been correctly pre-tensioned as it was ground. After re-inserting the iron and lightly nipping up the cap to working tension (less than half a turn past the point where the blade advance is free enough to work) the triangular gap was gone. It may not sound like much, but getting that just right is a really clever bit of metalworking.

I would have absolutely no qualms about putting these tools in front of some of the top cabinetmakers in the country, they really are that good.

So, perhaps we had better make that the big FOUR from now on!!!