Search This Blog

Showing posts with label instructions and guidelines. Show all posts

Thursday, 24 November 2011

Lateral Thinking !

Quangsheng No. 62 Low Angle Jack Plane

One of the minor points levelled against bevel up planes is that their capacity for lateral adjustment is limited because the cutting iron is nestled down between the side wings.

Here's a quick and easy way to give your bevel up plane as much lateral adjustment as a bevel down one.

mark the area to be adjusted

First mark up the sides of the iron with a permanent marker so that you can monitor your progress.

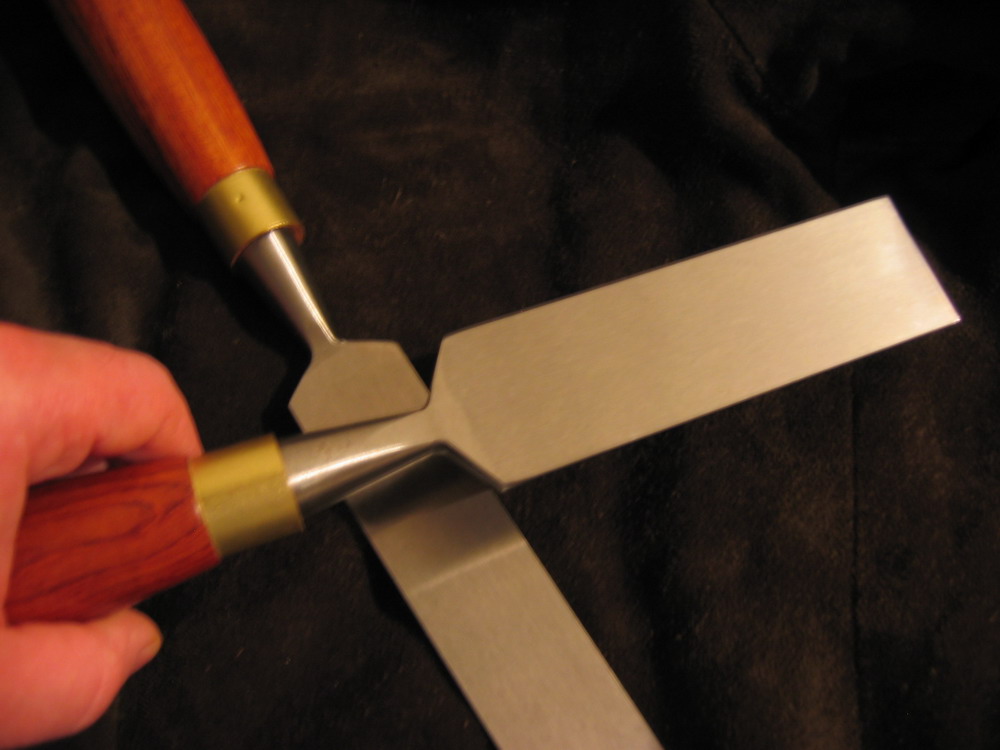
grind a small amount from the sides of the blade

Next carefully hold the blade over a linisher (a well secured upturned belt sander will do if you don't have one). Allow the shoulder of the blade to make contact first and then gently lower the blade until the sparks start just behind your thumb. You are aiming for this:

decrease the width of the blade

A nice even taper running from about halfway up the iron to the shoulder, taking about 1.5mm to 2mm out of the width on each side at the shoulder.

The result:

lateral adjustment improvement

About twice as much adjustment as you had with the parallel sided iron, and the front end remains parallel so it will still fit into a side clamping honing guide.

The Quangsheng iron I am using here is differentially hardened carbon steel (only hardened from the slot down so that the soft upper part dampens vibration). Air hardening steels are all or nothing, so if you try this with an A2 blade the whole thing will be hard and it may take a little longer to grind back.

Wednesday, 19 October 2011

The Combination Square

many uses for a combination square

Invented in the United States in 1878 the combination square is a very versatile instrument indeed. I thought it might be fun to run through as many ways to use one as I can think of and then see if anyone can come up with any others.

As well as the obvious uses for marking lines square to or at 45 degrees to an edge, the combination square can also be used as a depth gauge:

using a combination square as a depth gauge

A rudimentary marking gauge or panel gauge:

using a combination square as a panel gauge

A protractor, dovetail marker or an extra sliding bevel if need be:

using a combination square as a protractor

A graduated centre finder for both establishing and measuring from the centres of round materials:

using a combination square as a centre finder

Or a mitre gauge:

using a combination square as a mitre gauge

A small level, (and because it's a square you also have a means of gauging for plumb):

using a combination square as a level

A greater level of accuracy can often be achieved by using the components independently.

The square head can be used as an internal 135 and 90 degree square:

using a combination square as an internal square

The centre finder as an external 90 degree square (note the cutout for the corner to rest in):

using a combination square as an external square

And the protractor head can be used as either a level or an inclinometer:

using a combination square as an inclinometer

On a good one like this Starrett C435M-300 Metric Combination Set, the photo engraved hardened steel blade is accurate enough to use as a straight edge too:

using a combination square as a straight edge

In almost all cases a dedicated tool probably will do a better job (assuming that you are looking at a similar quality level). However, for a lot of woodworking tasks the level of accuracy you can achieve with a decent combination square is perfectly acceptable.

If budgetary restrictions are a consideration then you may be better off getting one good quality combination set than struggling with lower quality individual tools.

The sheer abundance of things that you can do with a decent combination square make it a wise investment for the beginner woodworker and it will always be a useful tool to grab whether you are working in or away from the workshop.

Saturday, 14 May 2011

Saw Handle Design

The interface between tool and user is a critical component of tool design and even subtle changes can have a marked effect on how the tool works.

Take this beautiful Thomas Turner tenon saw for example, the grip is reasonably vertical with a pronounced bulge in the back. To understand the reason for this we need to consider the 'hang' of the handle. A tool with a straight handle (like a gents saw or a carving knife) gives a great deal of control. Wafer thin slices of roast beef or finely executed joinery... In contrast a tool with a more vertical handle (like a steel framed bowsaw or a plane) is all about maximum transfer of power.

In this example we have a bit of both but the emphasis is on power. English backsaws can be steered left or right for the first few strokes, after that the kerf, gravity and the set (the amount by which the teeth protrude left and right from the saw plate) take over and do all of the steering for you. To begin the cut with this saw you would grip at the top with your thumb and extended forefinger and relax the rest of your hand to maximise your control.

With the workpiece secured in the vice so that the cut is plumb , all you have to do is feel for the zero moment when the back is directly over the teeth and gradually allow more of the saw's weight rest on the workpiece. With a new saw you have the advantage of being able to observe the reflection of the timber in the side of the saw plate too - if the reflection seems to carry on straight through you know the saw is plumb. With an old one you need to be more conscious of feeling for vertical, the weight of the saw is all in the heavy brass back, making it more 'tippy' so the point of balance should be relatively easy to feel for.

Once the kerf is established you can relax your thumb and forefinger and tighten up a touch with your little finger and the heel of your hand, this changes the grip from the top part of the handle to the bottom part - from control to power. By this stage there is no steering to do, the kerf is holding the spine perpendicular over the teeth, the spine is providing the weight to keep the teeth engaged and the set is ensuring that the left and right teeth are bearing equal measures of the work so the kerf stays straight. The faster you go on the push stroke, the more material you will remove with each pass, and as long as you don't grip too tightly and pull it off course, the cut will continue dead plumb and true.

Whether you are squeezing at the top for control or at the bottom for power, your grip should always be relaxed enough that you can feel the soft flesh of your fingers give a little each time you switch from pull to push, it really is a very light touch indeed.

With sharp teeth and a well balanced set I'd be happy to bet this saw will easily eat half inch oak at a rate of an eighth of an inch with each stroke. A new one with a much thinner plate and harder modern steel would possibly manage double that.

If you fancy having a go at fine tuning your own saw handle shape we have Atkinson Walker tenon and dovetail saws available in kit form with full instructions and downloadable templates. The Pax 1776 range were also designed to be adjusted to suit the individual user, the finish on the handles is just straightforward Danish oil (tung oil) so any alterations you make can be easily blended into the original finish.

Thursday, 10 March 2011

Blonde, French and Horny !!!

No, not Amelie Honore, the missus wouldn't let me play with that in the shed!

I've had this knife blank knocking about for ages and have got as far as cutting out the scale blanks in various materials but always changed my mind.

Anyhow, the tuit finally rolled around and I decided to clad it in some lovely translucent French cowhorn.

I cut and filed the bases as accurately as possible to give a neat fit against the bolsters and ensure that the handle would all fit within the scale blanks. A quick trim around with a Jewellers saw brought everything to within a few mm.

I decided to conceal the pins within the scales, giving the strength benefit but still retaining a cleaner look. The holes were drilled to half the thickness of the scales using the tang as a guide.

After glue up it was on to the rasps to refine and develop the shape.


Then a fair bit of coarse sanding to smooth out the transitions and fine tune the shape.

Before moving on to finer papers and finally mops and compound.

Off with the tape, a quick clean up and it's job done. I'm not sure why the bolster looks so scratched, it's not perfect but it's nowhere near as bad as it looks. Apart from being a bit smelly at the rasping stage the horn was a lovely material to work with. Now that it's all polished up you can just make out the brass pins through the handle scales.

Tuesday, 9 November 2010

The 5 Minute Guide to Axes

There is a wealth of information about axes on the internet, but here's a 'quick n dirty' bullet pointed guide that gives you as much info as possible in the briefest form I could manage. If you still have questions please feel free to drop me a line and I'll do my best to help.


Types of Axe

Felling Axes: Thin blades for slicing through the fibres of the timber.

Splitting Axe: Axes with fat triangular heads for driving timber apart along the fibres.

Universal: Halfway between a felling axe and a splitting axe and surprisingly effective at both jobs.

Hatchet: Small highly accurate tools for trimming and fine splitting.

Blade Shape

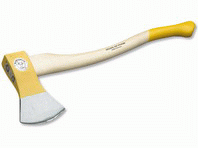
Broad: Broad faced felling and universal axes tend to work better on softwoods like pines and firs.


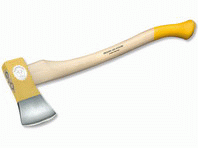
Narrow: Blades with a short cutting edge concentrate the power and are generally better for harder timbers.


Length vs. Mass

The power of an axe blow is a function of the head weight, the handle length and the amount of energy the user puts into the swing.

Heavy head: Lots of power and momentum, takes more effort to use.

Light head: Easy to wield, but less effective.

Long handle: Multiplies the energy of the swing

Short handle: Greater accuracy

A big heavy head on a long handle with a skilful and fired up user (eg OX 440 H-2708 Competition Sport Axe) will make the maximum amount of progress in the minimum amount of time but is exhausting to use.

A relatively light head with a long handle (eg OX 16 H-1008 Iltis Canadian Felling Axe ) will give the most efficient transfer of the users energy into cutting power but may require practice to control.

A relatively heavy head on a short handle (eg OX 395 E-601 Carpenter’s Bundle Axe) gives the best possible accuracy.

A relatively light head on a short handle (eg OX 25 H-0806 Harz Pattern Universal Axe) is light to carry, easy to wield and accurate, although the size of workpiece that can be tackled is limited.

Handle Materials


Ash: Has a very high strength to weight ratio (which is why it was used to make the frame for the Wright Flyer and still is used to frame cars like the Morgan +4). A very traditional timber for axe handles its only drawback is that when it does break it tends to break in two.

Hickory: (shown above) is massively strong stuff, good quality Hickory (the best comes from North America) is capable of 3-4 times the physical loading of Ash. It also has a very long fibre structure which means that it splinters apart but is unlikely to break fully in two.

Fibreglass: Modern synthetic handles are virtually unbreakable, immune to the cold and wet and on paper they seem the obvious choice. They just don't have quite the same feel as wood though.

Sharpening

Acute angles: (typically found on felling axes) are sharper but more delicate.

Obtuse angles: (typically found on splitting axes) will be more durable.

Axes should be sharpened with convex bevels, which are stronger than flat or hollow ground ones.

Axes should never be reground on a powered grinder. If you get a big ding in the edge an aggressive file is the best way to remove it.

Safety

No steel on steel. Hitting two pieces of hardened steel together can cause chips of steel to fly off. By all means drive aluminium, plastic or wooden wedges with the back of a splitting hammer or hit steel axe heads or wedges with a polyamid or wooden mallet, but no steel on steel please.

Eye protection: Speaks for itself, big impacts, unpredictable materials, one pair of eyes.

Gloves: Not woolly ones, proper rubberised work gloves that give an effective grip and provide some protection against splinters.

Check your equipment: Make sure that the head is securely fixed to the handle and check the handle for any signs of damage before starting work – every single time.

If it doesn’t feel safe don’t do it: Think about where the axe will go if you miss or the material moves, if a body part features anwhere in the plan for stopping the axe – make a new plan. A knee high chopping block is an essential safety aid for chopping.

Tuesday, 2 November 2010

Saw Handle Instructions

Woodworking saws

Thanks to some very generous assistance from Aiden (The Tiddles) of UK Workshop, we finally have handle plans available for the Atkinson Walker saw kits. Thank you to those who have been waiting for them.

Download saw handle templates here.

A step by step guide how to make your saw handle can be found here.

The guide to sharpening and using your new saw is here.

For an intermediate woodworker, these kits are great fun to make and you end up with a fantastic set of saws that you will enjoy using for many years. They also give you an appreciation of how much work goes into producing top-end handmade saws and perhaps even a few new skills that you can transfer to other projects.

Thursday, 28 October 2010

Supersize Me!

Narex mortice chisel in use


The new 12mm, 14mm and 16mm Narex mortice chisels arrived the other day (along with some new sizes of the Narex bevel edged chisels) and being an inquisitive sort I had to have a play!

I had expected the 16mm mortice chisel to be a bit of a brute to wield, it is after all an enormous chunk of steel, but in its working position the weight is all borne by the workpiece. Making the initial cuts with the blade pinched low down between thumb and forefinger, you can feel the chisel start to 'swoon' if you get too far from vertical, when it feels weightless, you know it's perpendicular.

The intial cuts suggested that making progress wasn't going to be a problem, 3mm at a time into English walnut with nothing more substantial than a sharp tap with the mallet.

Having cleaned out the first layer of chips to create the shoulders of the mortice I moved on to heavier blows and the chisel just ate its way in. A handy tip I picked up from Jacob Butler is to chop through the waste rather than trying to clear it as you go. This saves a bunch of time and preserves the shoulder as all the force is going downwards. The chips gradually get more and more finely chopped too, so most of them will fall out when you turn the workpiece over and give it a sharp tap on the bench, especially if you made a cut lengthwise through the middle of the waste with a broad bevel edged chisel first. What little did need levering out at the end was done by using the kevlar reinforced head of the clamp as a fulcrum, again to preserve the crisp finish.

Considering that this was all done with the factory finish on the cutting edges I was pleasantly surprised and impressed with both the efficacy of the tool and the results. A little judicious honing of the primary cutting edge and the first inch or so of the sides will no doubt yield further performance.

If you haven't tried cutting mortices by hand I can thoroughly recommend it. Morticing machines have their place and if you are doing production work they are invaluable, but if you are only doing a few slots to cut then chiselling them is a quick, inexpensive and rewarding alternative.

Sunday, 11 July 2010

A Visit to David Charlesworth

David Charlesworth

I dropped in to visit to David Charlesworth's superbly appointed workshop on the beautiful Hartland Peninsula in Devon last week. David and his students were examining the task of sawing to a line. David has a painstakingly methodical approach to woodworking that drives some people nuts, however the result of his academically thorough analysis is often a simple 'now-why-didn't-I-think-of-that-before' alteration of technique that saves a bunch of time and effort. Here's an example:

When sawing to a line you normally rest the saw on the compressed side of the cut. If you are holding the saw with a light touch, have the timber perfectly horizontal in the vice and keep the blade perpendicular to the workpiece, the saw drops in diagonally during the first couple of strokes and the left hand side of the kerf proceeds along the line.

Rob Cosman advocates starting the saw on the solid timber adjacent to the knife line to take advantage of the way it naturally moves along the path of least resistance until it reaches the mark like this:

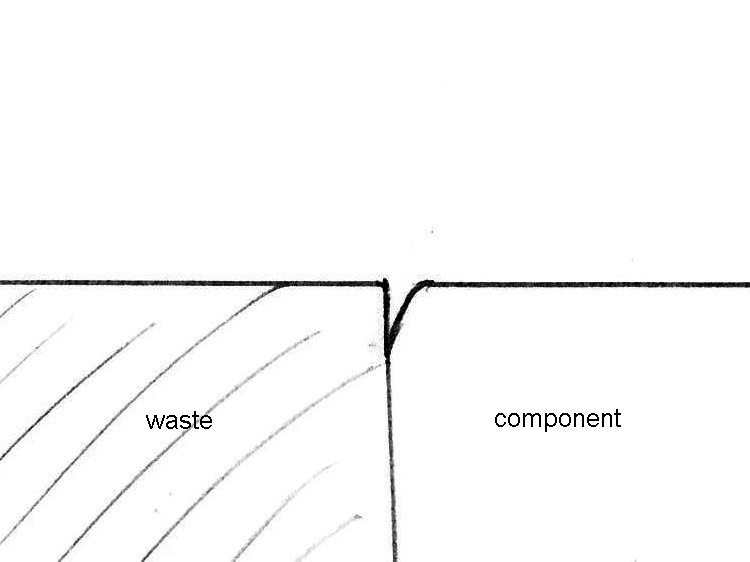
Now consider a situation where you are forced to cut on the uncompressed side of the knife line - for example cutting dovetail pins that have been marked out using the tail board as a template:

If you try to balance the saw on the waste it will naturally want to fall towards the unsupported side and you will end up cutting the component rather than the waste.

One solution that David picked up from Robert Ingham is to offset the template component to compensate at the layout stage. The amount of offset required varies depending on the kerf of your saw and the angle of your dovetails but Robert's rule of thumb is to have the tail board overhanging towards you by about 1.5mm.

The alternative method that David and I arrived at was to mark out on the line that you want to cut and then lay a chisel into the layout line to guide the saw for the first couple of strokes until the cut is established. Metal on metal is not ideal, so making a simple wooden chisel from something harder than the workpiece for the purpose would be the best solution.

Because the fibres on the bevel side of the cut have merely been compressed rather than cut, they can be made to expand back to their original position with the application of a dab of water after the joint is assembled, indeed the fact that they are compressed makes for easier assembly and a reduced chance of damaging the edge during the process:

David runs short 5 day courses throughout the spring and summer and a long 12 week course starting in September.

Friday, 7 May 2010

Chisel Backs

Ashley Iles chisel back

We've had a couple of questions this week about preparing chisels, specifically the hollow ground Ashley Iles chisels, so I thought it might be worth covering it here. Lets start off with what we are aiming for on the back of the blade.

The backs of chisels used for paring need to be sufficiently flat that they can take a full length cut without diving into the wood or pulling up out of it by more than 1/10 of a mm over the length of the blade. The tolerance for chopping chisels is a little wider as there is a limit to how accurately they can be held at 90 degrees to the work.

When it comes to honing, a very slightly hollow ground back is preferable to a convex or perfectly flat one, the word ‘slightly’ is key here because it still needs to be flatter than a tenth of a mm in order to remain accurate. Dead flat itself is no good because you need to remove material over the entire back of the blade in order to polish the important bit that forms the underside of the edge. Also any imperfections in your technique will tend to cause bumps or drubbing of the corners, which are self perpetuating and eventually get worse if you are working on a sharpening medium that is larger than the tool.

Bumps in the back will register first against whatever material they come into contact with and then wobble around looking for another point of contact in order to become stable. A lot of people think that bumps are an insurmountable problem, they are not, they simply call for a different technique. Nonetheless, in an ideal world, somewhere between dead flat and one tenth of a mm hollow is where we want to be.

After a great deal of time and effort the team at Ashley Iles eventually managed to achieve a reliable 0.04mm (+/-0.02mm) hollow on their cabinetmakers chisels. Although still perfectly accurate from a woodworking perspective, they are just hollow enough that when you lay the back on a dead flat surface, they only make contact at two points.

To polish the edge, lay most of the length of the tool on the sharpening media and draw it off the edge, lift off, go back to the start position, and repeat. The underside of the cutting edge is in contact with the sharpening media for the full length of the stroke, so it gets polished within a few strokes. The edge of the sharpening media also makes contact with an area inside the hollow and wears away a little material there too, so over many years of sharpening, the back will gradually get closer and closer to dead flat but never quite get there - perfect!

So a dozen or so strokes on a fine waterstone to remove any grinding marks that extend through the cutting edge when you first get them, then a couple of strokes on a fine stone after each honing and that’s it.

Tuesday, 30 March 2010

More Haste – Less Speed

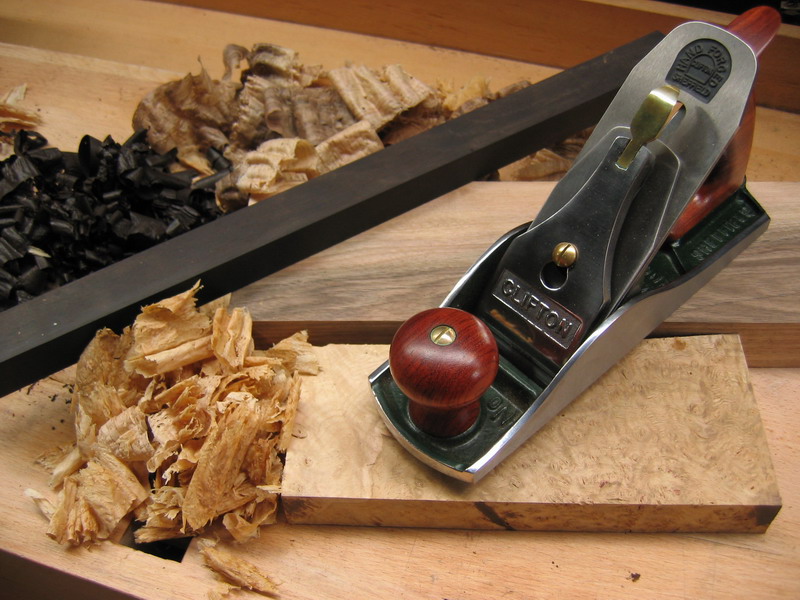
Clifton planing ebony walnut and oak

When you first start working with handplanes it is inevitable that sooner or later you will come across the problem of tearout. It is a common problem and every time you think you’ve cracked it another tricky piece of timber comes along that doesn’t want to play nicely. It usually happens because the grain of the timber is not all flowing in the same direction so the cutting edge of the plane iron is no longer cutting the fibres but instead is splitting them away from the surrounding material.

There are a broad range of weapons in the cabinetmakers arsenal to tackle this issue but it’s all too easy for experienced makers to omit the first and easiest way when they are advising others on how to tackle it, probably because they do it habitually and without thinking.

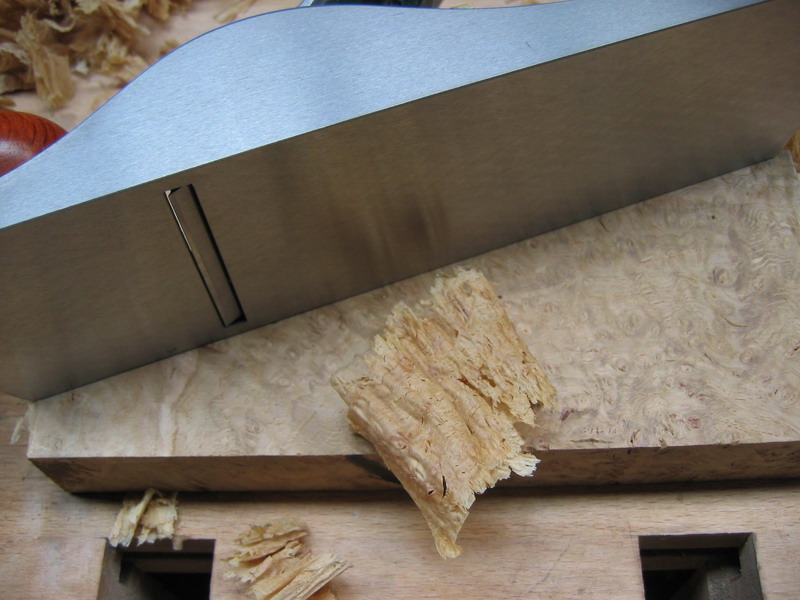
Clifton vs. Oak burr

Assuming your plane iron is sharp, the first port of call when you experience tearout is to slow down – right down. Nothing else changes, your stance, distribution of pressure on the plane, angle of the plane to the work, all remain exactly the same, you just take your good old time - perhaps ten seconds or so per foot of timber planed.

Observe the shaving as it emerges from the mouth, the shaving contains a wealth of information about what just happened at the cutting edge. Holes with flowing shapes and very thin frail edges indicate low spots, changes in the texture of the shaving indicate patches of reversing grain that the plane is coping with already and jagged holes with thick edges indicate areas that it is not coping with.

Quite often the simple act of slowing down is enough to either make the problem disappear completely or reduce it to a couple of thumbprint sized patches that can be cleaned up afterwards with a thin cabinet scraper.

The next simple step is closing up the mouth to a slit and backing off the depth of cut so that the plane is only just cutting, a really light wispy shaving invariably produces a finer surface finish than a thicker one.

Honing your cutting iron is the next step, as the first few passes with a freshly honed iron are much less prone to tearout. The final finishing passes on a piece of timber should always be taken with a freshly honed cutting iron, regardless of whether you only honed it five minutes ago or not.

Only when you have worked your way through the 'low hanging fruit' that requires no additional kit and the bare minimum of extra time should you start thinking about steeper pitches or scraping.

Tuesday, 4 August 2009

Sharpening and Using English Backsaws

Atkinson Walker Saw

A couple of weeks ago I put together a set of guidelines on how to sharpen, care for and use English Backsaws. Sharpening is easy enough once you know how, but can be an onerous task the first time around, similarly people often have problems starting a cut, but with a little explanation the problem is easily solved. We now send out a paper copy of this with both our PAX and Atkinson Walker ranges of backsaws and backsaw kits.

For people who are not yet customers and those who have bought these products from us in the past but didn't receive a copy with their order, a pdf version of our saw sharpening instructions is available.

Speaking of backsaws, I have just finished carving some lambs tongues into the handles on the prototypes for the gorgeous new PAX 1776 heavy tenon saws, which will be available shortly. One final prototype has gone down to Mark Baker of Furniture and Cabinetmaking to be reviewed in a forthcoming round up of all the top tenon saws on the market. The other is on its way up to Sheffield to be used as the sample so that Christian can carve and sand the production ones to the same spec.

Peter Benson's detail selection carving tools were an absolute godsend for this job, so I've included some in the package going to Sheffield.

Prices for the new saws will be £125 each or £225 for a pair, including VAT and carriage.