Search This Blog

Tuesday, 17 September 2013

Workshop Heaven Saw Handle Making Competition

Make your own saw handle, win a furniture making course

Make a saw handle - and you could win a £600 bespoke training course at one of the worlds finest furniture making studios!


The Prize

A 1 week bespoke cabinetmaking training course at Robinson House Studios with award winning designer maker Marc Fish. You choose which particular aspect of furniture making you would like to focus on: sharpening, drawing, hand planing, laminating, dovetails, mortice and tenon joinery - and Marc will tailor the training to suit you.
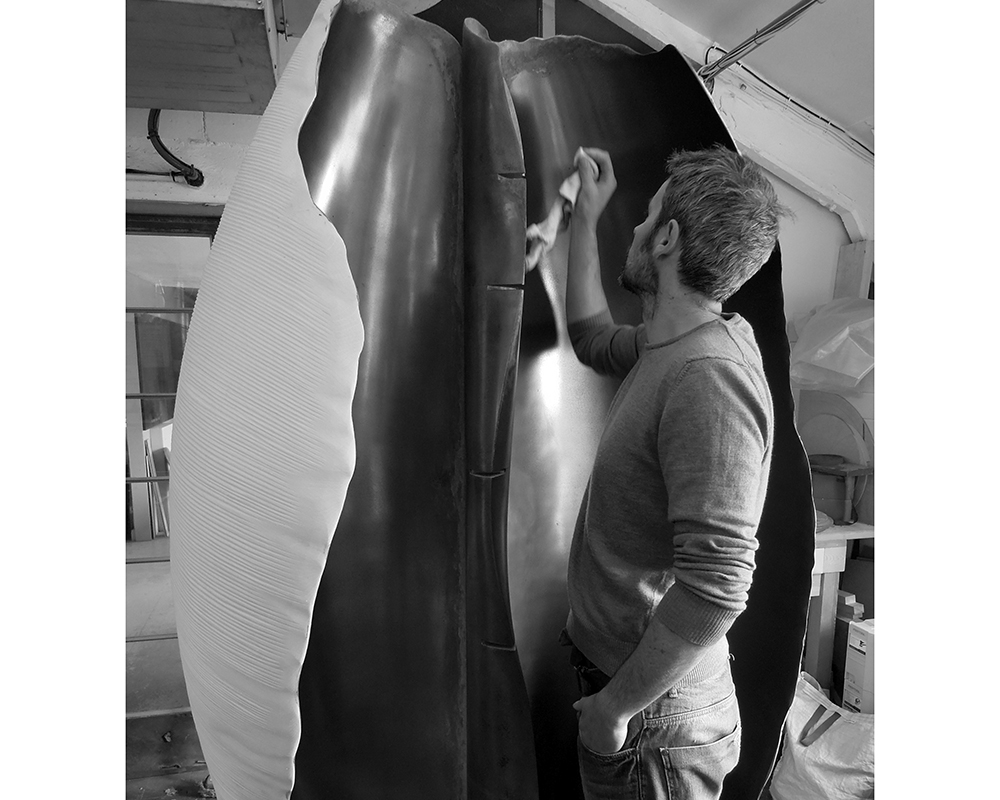
Marc Fish Babel Drinks Cabinet

Marc may only make a handful of pieces a year, but each one is so exceptional and so different that the whole industry takes note. As well as exquisite furniture, the studio also produces some of the most promising faces of the next generation of designer-makers, including names you may recognise like Chris Funnel and Rhys Gillard.

How to enter

It couldn't be easier, just send an message on our contact us page listing the following:

1. your name

2. The county (Hampshire / Cornwall etc) where you live

3. Your phone number

and we will send you a discount code giving you 15% off Continental hand stitched rasps, Atkinson Walker handsaw kits and African striped ebony saw handle blanks within the next working day.

Once you have assembled all of the materials that you are going to use, send a photo of them (800 to 1000 pixels wide if possible). Send another photo of what it looks like halfway through, and then a third photo of the finished handle attached to the saw.

All photos must be received by November 5th 2013 - remember, remember!

The winning entry will be chosen by Marc and announced on November 15th.

The Small Print:

No purchase necessary, if you want to rehandle a saw that you already have - go for it. The sycamore for the handle in the photo above came from the firewood pile. This is purely a skills competition and entries will be judged on that basis alone.

The prize includes your training at Robinson House Studio in Newhaven, Sussex. It does not include meals, accommodation or travel to and from. However if you need recommendations for places to stay, Marc will be happy to oblige. The course will take place on mutually convenient dates to be agreed between Marc and the winner.

Workshop Heaven and Robinson House Studio reserve the right to use any submitted photos for marketing or other purposes. We may also add you to our email newsletter lists, don't worry, we are quite civilised and don't bombard you with 'deal of the day' (we hate that as much as you do) you will be invited to accept or decline and can unsubscribe at any time.

Where entrants are referred to in accreditation or announcements it will be in the form 'Dave from Bedfordshire' or 'Dave R from Bedfordshire' (if we get two Daves from Bedfordshire). If we get two Dave R's from Bedfordshire we might have to call one of them David.

If things don't go quite right with your handle and you want to start afresh, please feel free to do so. We're woodworkers too and we've all been there. Just email a photo of your new materials and carry on as before.

Entry is open to all Woodworkers aged 16 and over. If you live outside the UK please be aware that if you win first prize you will need to get there under your own steam.

No cash alternatives.

Entries can be handles for any hand saw (handsaw, dovetail saw, tenon saw etc) if you really want to do a gents saw handle - feel free, but please remember it is a competition to demonstrate your skill level.

FAMAG forstner drill bit

Useful saw handle making links:

Tenon saw kits

Dovetail saw kits

Free saw handle templates

Free step by step instructions

Free saw sharpening instructions

Hand stitched rasps

Saw sharpening files

Bormax Forstner bits

Precision HSS lip and spur drills

Thursday, 11 July 2013

Adam Savage Loves Knew Concepts Saws

How to select the right blades for your Knew Concepts saw:

Just like bandsaws and tablesaws, your jewelers fretsaw frame changes personality depending upon the type of blade you have installed. With the right blade you will get fast, smooth easy sawing and a clean finish.

Knew Concepts recommend Pegas Swiss-made saw blades, so at Workshop Heaven we decided to stock the entire Pegas range in packs of 12 blades - so you can get your saw and the blades in one transaction. The more popular flavours are now also available in packs of 144 blades. The Pegas range of 5" unpinned blades is huge, so here's a few pointers to help you select the appropriate blade for the job.

Choosing the right tooth pattern

For dovetailing: Skip reverse blades

These have plenty of gullet space to clear the waste and a patch of reversed teeth at the end of the blade, which gives you an entry quality cut on both faces. There are only four sizes and a pack of each will cover the normal range of material thicknesses used in furniture making.

For Jump rings and thin sheet metal: Regular tooth metal cutting blades

Fine blades with a regular tooth pattern to give a smooth cut and a beautiful finish. Always get blades with a rounded back as they are easier to turn and less prone to breakage.

For Marquetry and fretwork: Spiral blades

The blade is twisted into a helix so it can cut in any direction. Tricky to hold a straight line, but much easier for following curved ones. Because you don't need to orientate the frame to the work you can still cut in any direction when working close to the full depth of the frame.

For cutting soft materials: Skip tooth blades

Softer materials produce swarf more rapidly than hard ones, skip tooth blades have gaps between the teeth to carry the extra material away without clogging the saw.

Double skip and modified geometry blades have even bigger gaps, and so require a higher reciprocation speed. Although they are wonderful in powered scroll saws, these two types are not really appropriate for use in Knew Concepts hand frames.

Choosing the right pitch (number of teeth per inch)

A good rule of thumb is to have between three and twelve teeth engaged in the material at any given moment, with optimum performance at 7 or 8 teeth.

For example if you are cutting 1/8" (3mm) thick material you would want to be around the 20 to 23 teeth per inch mark. For harder materials like steel, go a little finer; for soft materials like wood and plastics a little coarser.

Blades for Knew Concepts Coping Saws

Chunkier frame = chunkier blades

Knew Concepts coping saws use 6.5" pinned coping saw blades, these are larger and have a transverse pin running through the blade at either end to transfer the tension from the frame to the blade.

If you have any questions, please feel free to ask, we are always happy to help.

Knew Concepts Titanium Birdcage Saw
Happy sawing...!

Saturday, 15 June 2013

Toothed Plane Irons

No tearout - none - zip - zilch - nada - zero!

Not even on this lovely piece of dry English burr oak. Go ahead, click on the photo to take a closer look.

How do toothed irons work?

Because the shavings produced are discontinuous, the forces involved in cutting any individual one are proportionally much smaller. They are also much weaker than a full width shaving and break more readily.

What about the lines?

Clearly you still need a well set up smoothing plane or a cabinet scraper to bring the board to a finish-ready surface, but the toothed blade will get you through the processes of removing any twist, wind or cupping and bringing the board to dimension, all at full speed and without a second thought for tearout.

Sharpening?

Sharpening toothed plane irons is, if anything, easier than sharpening standard ones. Just a flat bevel at 25 degrees and a quick wipe on a leather to remove any burr - job done.

Setup?

It's the complete opposite of a smoothing plane, you want a wide mouth and the chipbreaker set well back from the cutting edge.

Why not use a back bevelled iron or scraper plane for the whole job?

Back bevelled irons and scapers will both help enormously with tearout prone timber, but the steeper the angle, the harder they are to push. A toothed iron cuts at the same angle as a standard blade, so you can whizz through beautiful gnarly burred timber with no more effort than you would need for straight grained wood.

OK I'm convinced, where can I buy them?

Workshop Heaven Fine Tools

Thursday, 30 May 2013

Victory

HMS Victory

First laid down in 1759, HMS Victory is the last remaining ship of the line and by the slender margin of 30 years, she is also the oldest commissioned warship in the world.

Although she served in several other campaigns, Victory is best known for her role as Nelson's flagship at the battle of Trafalgar in 1805. Rather than drawing alongside the combined navies of France and Spain in the traditional manner, Nelson attacked perpendicular to the line. This meant that the British fleet, and Victory in particular, would have to endure being 'raked' on the run in. Cannonballs flying along the length of the decks are much more dangerous than ones going across, and the fact that Victory's fore top sail alone had 90 holes in it at the end of the battle gives some idea of the ferocity of the bombardment. The payoff though, was that every single British gunner would each be offered the chance to return the compliment and rake an enemy vessel at point blank range as they passed through the line.

HMS Victory below deck

Buried deep in the bows of the ship is the surprisingly roomy workshop of the ship's carpenter. It is at this point that the sudden realisation hits you - they built and maintained these things entirely with hand tools.

Six thousand oak trees in this one vessel alone, and every single one of them cut down, riven, sawn, shaped and fitted together by hand. This achievement is made all the more remarkable when you consider that Benjamin Huntsman was still in the process of developing the first high quality edge tool steel at the time.

HMS Victory carpenter's shop

One of the nice things about Portsmouth Historic Dockyard is that you don't feel like a tourist being herded through a process. You are free to explore the various ships and exhibits at will, visit the tea room for exceptional and very reasonably priced cakes if you want to, or wander into the gift shop of your own volition.

As you would expect, the shop is choc full of pens, mugs, plates, keyrings and other 'souvenirs'. I have always thought on trips to museums and historical attractions, how wonderful it would be to able to take home a real artefact as a souvenir - something genuine!  Of course I have always dismissed the thought as pie in the sky, you can't possibly expect these places to sell genuine artefacts as souvenirs... can you?

Lo and behold, in the corner of the shop was a glass cabinet full of lumps of oak that had been removed from Victory during the current restoration work. They were being sold off with the proceeds going to help fund the restoration work. Apparently there are lots of people who wouldn't want to own a smelly old lump of wood and prefer a nice baseball hat or a t-shirt instead - I'm not one of them.

HMS Victory a lump of history

Here it is, complete with an iron nail, layers of whitewash and the smell of the sea! I'm inclined to keep it just as it is, but everyone keeps asking me what I am going to do with it?

What would you do?


Tuesday, 14 May 2013

Handcrafted

Workshop Heaven

We don't just sell hand tools, we enjoy using them too!

Here's a little 'behind the scenes' video showing how the new www.workshopheaven.com homepage image (above) was created.

My thanks to Helen Everett who has been helping us out with filming, production, editing, and has inspired me to make more videos in the near future. We wish Helen well on her travels to teach children in Cambodia this summer.

Beautiful tools, great prices, friendly service!

Wednesday, 17 April 2013

Honing a 2506 Shoulder Rebate Plane

Quangsheng 2506 shoulder rebate plane

Metal shoulder rebate planes have been with us, in one guise or another, since the 1860's when Edward Preston and Sons started it all off with the No.1369. Given that they have been around for so long I doubt if I am the first to figure this out, but when you come to the job of honing the blades it certainly makes life a whole lot easier, so I thought it was worth sharing.

A shoulder rebate plane is used for perfecting the final fit of existing rebates (rabbets / rabbits / whatever..) or indeed any other situation where you need to fine tune a surface with reference to an adjacent shoulder. They take the merest wisp of a shaving and their performance on endgrain is enhanced by the very low bedding angle and skewed blades. The blades are ground at 15 degrees which is great for softwoods but a little bit low for hardwoods.

This brings us to the problem of how on earth you hold these tiny skewed cutters to put a secondary bevel on them?

The answer: Take off the fence and removable nose of the plane, swap the cutters over and invert them, and the plane becomes it's own honing guide.

Honing a 2506 rebate plane

The angle can be adjusted by altering how far the blades protrude. Note the use of a slip of backing film to prevent the sole of the plane from being eroded. For increased edge strength you can also add a micro back bevel on the underside of the blades using the same technique, but with the blades the right way up.

Adjustable / reversible fence and removable toepiece
Adjustable / reversible fence and removable toe piece

I have no idea whether this was an intentional part of the design or not, but it works, and may go some way towards explaining why this classic design has remained almost unaltered for over a century.

The Preston 2506 (upon which the design of this modern Quangsheng 2506 is based) was Preston's second design of a shoulder rebate plane, omitting the unworkably fiddly adjustment mechanism of the 1369 and adding a removable and reversible fence. Originally the fence was an option but was later included as standard on both the Preston 2506 and the later Record 2506.

Setting the depth of cut on a 2506 rebate plane

Setting the blade on a 2506 is simplicity itself, lay the sole flat on a scrap of timber, gently pressing the blade in with your fingertip, and then tighten the knob. The harder the wood you use to set it, the finer the shaving.

Beautiful tools, great prices, friendly service!

Monday, 4 March 2013

Paring Chisels 101

Narex 8132 Paring Chisels

A paring chisel is used for...

As the name suggests, a paring chisel is used for paring away small amounts of material to achieve precisely the surface that you want. A paring cut is parallel with the surface of the surrounding timber, whereas a chopping cut is perpendicular to it.

A classic example is slightly undercutting the endgrain surfaces that will form part of a joint. Undercutting a tenon shoulder for example leaves a small line around the outside edge that will 'make' with the adjacent component, the undercut guarantees that the joint will not be 'held open' by any irregularities or debris. Because endgrain is not a glue surface, the joint is no weaker, and if you do get a little bit of glue squeeze out from the tenon cheeks as the components are assembled, the undercut gives it somewhere to go that doesn't show on the finished piece.

undercutting endgrain edges of a joint

Another traditional use for paring chisels is in conjunction with a saw. Slicing away an incline on the waste side of your knife line creates a shoulder for the saw to ride against, guiding it onto the line. One tip that I picked up from David Charlesworth (who I believe got it from Rob Cosman) is to start the saw on the top of the incline and allow it to drop naturally onto the shoulder as you make the first stroke. It's all very subtle stuff but it does seem to produce a noticeably better result than trying to start with the saw teeth in the bottom of the v groove.

using paring chisels together with a saw

Paring chisels are also excellent for shaping work, using facets in the same way that a stonemason would in order to monitor your progress. To create a cylinder from a square for example, you slice away the corners to make an even sided octagon, then keep cutting away the remaining crests keeping all of the facets straight and even as you sneak to within sanding distance of the final shape. For another example of paring using facets, see our "making a wedge for a Richard Kell No.3 honing guide" video.

Why do paring chisels have such a long blade?

The primary reason for a paring chisel's length is not reach, but balance. Imagine walking upstairs, carrying a cup of tea, holding the saucer with both hands. Now repeat the exercise but with the cup and saucer on a tray - much more stable. The further apart your hands are, the more accurately your body can find and maintain horizontal. Indeed with Japanese paring chisels the blade length is not that much greater than a normal bench chisel, but the handle is much longer. One of the reasons I prefer the western design of paring chisel is that by having most of the length as blade rather than handle you get the additional reach and potentially longer blade life thrown in as a bonus, but these are really secondary benefits.

Why aren't all paring chisels cranked?

On first impression a cranked paring chisel looks like more versatile version of a straight one with the added advantage that it can go anywhere. In fact it is quite the opposite. Lets go back to the tea tray example and put one handle higher than the other, the amount of concentration required to keep the thing level is now greatly increased, one slight lapse and you've sploshed PG tips all over your custard creams. Cranked paring chisels are specialist tools with comparatively limited application. For the majority of jobs where you might use one, there are usually two or three alternative ways of doing it (bullnose plane, rebate plane, etc).

How do you use a paring chisel?

It's all about minimum force and maximum control. The cutting edge should be absolutely shaving sharp, a very sharp edge cuts with less resistance and the smaller the amount of exertion required, the more control you have. Paring chisels are often ground 5 or so degrees shallower than the standard 25, sacrificing a little edge strength to achieve greater sharpness and lower penetrative resistance. They are sometimes tempered a couple of points softer than a bench chisel so that they are easier to touch up frequently.

You can further reduce exertion and increase control by using bigger muscle groups and letting your body weight work with you rather than against you. Your arms hold the chisel steady, elbows tucked in close to the body but with all of the muscles in your arms relaxed. The pommel of the handle nestles into your dominant hand, palm facing upwards. With the other hand, pinch the the blade as far forward as possible so that your forefinger is supporting the blade and resting on the timber. Stand with your feet apart, as you would to play snooker or pool, and allow the blade to slide between the fingers of your guiding hand as you make the cut, using the bigger muscles in your legs and backside to control the application of your bodyweight.

If you are paring vertically, the principle is exactly the same but you use your core (abdomen) muscles to control the application of your bodyweight. The workpiece should be positioned low enough that you can get your shoulder directly over the cut.

Scary sharpening a paring chisel

Do paring chisels need to be lapped dead flat?

Within reason, yes they should be within two or three thou of flat. Ideally a paring chisel should be ever so slightly concave. This makes it much easier to sharpen because you can access the underside of the cutting edge. If it starts out absolutely flat then the chances are that normal sharpening will eventually cause it to become convex. A slight convexity is undesirable but nothing to be afraid of, just work the chisel on a coarse abrasive surface that is shorter than its length (across the stone or a narrow strip of film) and concavity will return. A narrow strip of 3M 100 micron AO micro finishing film is ideal for this task.


Beautiful tools, great prices, friendly service!

Monday, 4 February 2013

The most wonderful shop in Paris...

...BHV...nope...(although the tool section on the ground floor is worth exploring)

...Galleries La Fayette - impressive, but no.

...La Samaritaine (sadly closed)...non.

All the grandeur and showmanship in the world can't compete for sheer loveliness with a small family owned business that has has been supplying culinary equipment to the chefs of Paris for nearly 200 years.

Situated on the corner of rue Coquillière and rue Jean- Jacques Rousseau in the 1st arrondissement (not far from the Pompidou Centre) E Dehillerin is an absolute Mecca for anyone who enjoys cooking. Professional quality pots and pans of every conceivable size and shape in copper, stainless steel, aluminium or cast iron. Porcelain tableware, wooden spoons from 4 inches to 4 feet long, knives and cutlery, stainless or carbon, in dozens of different sizes and styles.

The most wonderful thing about Dehillerin though, isn't so much the wonderful products that they sell, but how they sell them, it's just like being in J.K. Rowling's Diagon Alley. Every last inch of the shop is full from floor to ceiling, the stock is carefully organised on plain wooden shelves and pigeon holes with price lists hanging from pieces of string. If you would like an extra thick copper whatnot, then a nice man will disappear up a ladder and get it for you.

When you have finalised your purchases, they are all wrapped neatly into brown paper parcels while your hand written invoice is prepared.

You emerge from Dehillerin feeling exhilarated, there is a feeling of stepping back into the present day after a wonderful journey through time. Compare that with the feeling of information overload imparted by a modern department store and you have 'the difference'.

You can order from Dehillerin online, although it is not quite like a normal e-commerce site. You send them a list of what you want, they email you a proforma invoice, you send the payment details and your culinary goodies will be dispatched 'tout-suite'.

Beautiful tools, great prices, friendly service!

Wednesday, 12 December 2012

The Quangsheng No.1 Smoothing Plane

The Stanley Bailey No.1 smoothing plane was produced from 1869 to 1943 when it was dropped from the range, presumably because of the squeeze on resources brought about by WW2. They were never produced in large numbers so their comparative rarity makes them a favourite with collectors and they now command astonishing sums at auction.

Like the Stanley original, the Quangsheng No.1 has a 1-1/5" wide iron, a bailey pattern frog and no lateral adjuster. Sales volumes of these planes have naturally been lower than those for the full size bench planes and production of them ceased about a year ago. I was able to get a single one made as a special gift to thank a friend - possibly the only time a factory in China has produced one of anything!

Having come face to face with one I wished that I had ordered some while they were still being made.  Three points in particular struck me:

They are perfectly suited for children and much easier for them to use than a block plane. Imagine how fast you would go off woodworking if you had to do all your planing with a 60-1/2 that is the size of a shoe box!

America is now a very much more wealthy nation than it was in the late 1800's and the American people are naturally interested in collecting the tools that their forbear's made. If I had a time machine and could go back to an 19th century tool shop I'd clean them out of mint boxed Stanley No.1's in a heartbeat! Now take a punt on where China is going to be in 100 years time.

If the original was in production for 74 years it must have been bought and used by someone, mint examples are thin on the ground, so the people who owned them must have used them.

Although they are no longer in regular production, we have managed to get a small batch of Quangsheng No.1's made. Whether this will happen again in the future is anyone's guess.


Beautiful tools, great prices, friendly service!

Wednesday, 5 December 2012

Independence knife!

I have a curious relationship with knifemaking, I might do 15 minutes here and there, sometimes weeks apart, and then get a sudden rush of inspiration and can't stop for anything until I've seen the job completed. Today was one of those days.

There were a couple of useful tips that cropped up in the process, so I thought I share them. The first is using one of these great little cylindrical cork sanding blocks (above) that come with a free bottle of wine. The cork supports the abrasive giving evenly distributed pressure, you can also roll it slightly as you are working to find a fresh bit of grit without having to reposition the paper.

A problem that I came across when shaping the handle with rasps was how to get close enough to the liners and the tang without scratching them. Even using 3M Frecut sanding would still take a while, unless I used really coarse grits and then you are back to the problem of scratches. Instead I tried using a cabinet scraper which proved to be fast, controlled and didn't scratch up the metal anywhere near as badly.

The blade for this knife was made by Chris Grant, a long standing friend and very accomplished bladesmith. It was made from our laminated white paper steel using the stock removal method and then given one of his awesome heat treatments. I won't give away Chris's secrets but he can make steel do wonderful things. You could literally shave with this thing!

As this is going to be more of a working knife than Amelie I went for a slightly blockier handle shape, one bit that turned out really well was a tiny almost imperceptible thumb depression on the top of the blade, this gives a really nice grip for controlled woodworking cuts.

Well I guess that's about it, but I do have one last special surprise for Chris....


wood blanks for knifemaking
.....Tartan Wood!


Beautiful tools, great prices, friendly service!